
 Sign In
 Create Account

 Find content
 Male
Male


 Posted by
 There are lots of scanlation groups that need your help, I understand that if you are a busy person you won’t have time to clean or to learn Japanese, but if you have time to read then I’m sure you have a bit of time to typeset a little in your weekends.
And don’t tell me you don’t have skill because none has them from the start.
Typesetting is the most enjoying and less time consuming part of scanlation (at last for me).
If you don’t have Photoshop you can download Photoshop cs2 from the Adobe page.
Here: https://www.adobe.com/cfusion/entitlement/index.cfm?e=cs2_downloads
Before, you have to create an account.
You have to download where it says this Photoshop CS2 It’s pretty easy.
The serial number is at right side of the link to download it but I’m putting it here anyway.
Mac: 1045-0410-5403-3188-5429-0639
Win: 1045-1412-5685-1654-6343-1431
Afterwards you only have to install it, I have Photoshop cs5 but I’ve installed Photoshop CS2 in another computer and everything goes very well.
A BIT OF TUTORIAL:
After you've installed Photoshop you go and open it, everything is easy and visual.
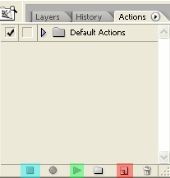
When you open Photoshop there are lots of windows.
You won’t use all of them so it’s better if you close some.
It’s better if you have only Actions, History and Layers.
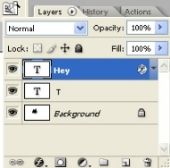
The image you have down here is where you have the tools of Photoshop; the one you are going to use will be the type tool, the one that’s in red.

If you click on it the type tool this will appear in the upper part of the program:

The red part is to make the text horizontal or vertical.
The green part is to put the type of letter you want to use.
The blue part is to put the style of the text (roman, italic, bold...).
The orange part is to put the size of the letter.
The dark blue part is to put how you want the letter to appear, (it’s better to put it to smooth).
The purple is obvious, put the text centered.
The black part is to decide which color you want the text to have.
The last but one part is to make the text take a form.
If you click at it this will appear:
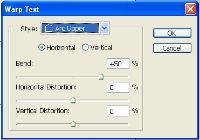
If you click in the style list you’ll be able to choose which form you want the text to have, for example this one:

And the last one  has more options if you click on it.
It has this options:

To stroke the text if the situation needs it, for example in the sfx that are in a drawing you have to go to "layer", "layer style" and afterwards "stroke".

And in stroke you have to decide which size the stroke has to have, if you want it black or white, if you want it to have a pattern...
Like I almost always use the same size of stroke I have made two actions of this step, I’ve called them white stroke and black stroke.
To make an action you have to go to actions:
Go to the red part and click on it, do the stroke or anything you want to be recorded, click on the blue part and now name the action.
When you have done that you can click on the action and it will repeat. Like this you won’t have to do all of the stroke process every time.
To fill the text with a pattern you have to go to the same place where you have gone to do the stroke, but instead of going to “stroke...” you go to “pattern overlay...”. Then you have to decide which pattern you want and all of that.
To make a pattern of an image for example the patterns that can be found in this page: www.psychobob.xepher.net/screentonez/
You have to open the image select all of it with the “rectangular marquee tool”  go to “Edit” and then to “Define pattern...”.
Normally the image that the group will give you will has two layers, one cleaned and one with the original text. I usually duplicate the one cleaned and put the opacity of the copy to 40%, then I click on the eye of the cleaned layer and then I see where the original text is and how it looks without the original text at the same time.
It’s better if you don’t put opacity in the original cleaned layer because one time I did it and I couldn’t change it afterwards.
But sometimes the group only gives you the cleaned image, if the group does that ask them the original files too, so that you can know where the text goes.
Almost all of the groups have sample pages on their web pages, so you can try all of this with them.
The most used fonts for normal bubbles are Anime Ace or Wild Words, for little words Augie, la cartoneeire...
Most of groups tell you which words are better to use but for sfx you can use whatever ones you think that are better.
Here the fonts I use:
rar: http://www.mediafire.com/download/ao82yve2ryba3vr/fonts.rar
zip: http://www.mediafire.com/download/aymyhyjheqyz1d2/fonts.zip
In the case you don’t know you have to put them in a folder of your computer where it says fonts and they install automatically.
If you don’t understand anything you can ask me.
I’m going to put some tutorials in here:
http://senbonzakura.kageyoshi.net/2009/05/02/typesetting/ and http://senbonzakura.kageyoshi.net/2008/06/13/photoshop-patterns/ you’ll need the patters sometimes so I recomend reading it.
And if you don’t want people who use the same computer as you know you edit manga you can go to http://www.rohos.com/ and use that program to hide the files. Or you can put a password on your rar files too if you have the program winRAR.
There are a lot of groups old and new that close because they don't have help so if you don't want to be left hanging and never knowing how that or this manga ended you know what you have to do, pay attention to the calling of the groups.
I think that’s all.
I hope you get in some group to help!

